Have you ever seen those sad little bags of white plastic masquerade masks sitting there in the craft store in all their dreary blandness? This fun DIY project transforms those inexpensive plastic shells into something beautiful! I was so pleased with the results. I can think of a ton of halloween ideas, not to mention masquerade fun! It never ceases to amaze me how you can add a little trim, fabric and sparkle and take something from drab to totally fab!
This project has been bouncing around my head ever since I did that first
Craftsy Costume Box Course back in 2011, which certainly qualifies it for a
Finish Fifty project! Now that the school year is back on, I might get half-way done with my list of fifty by year’s end . . . do you think?
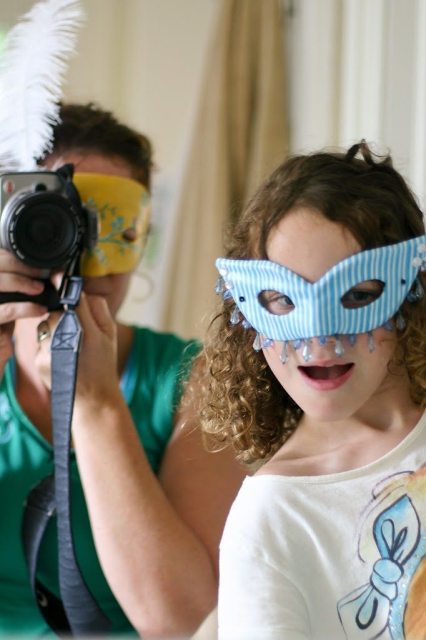
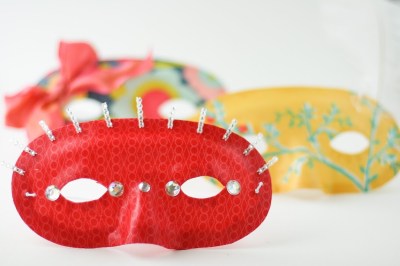
Allie’s favorite is the blue one with the bead danglers. Meanwhile, I’m more partial to the big pink bow over the eye. Certainly though, these could go dark and dramatic, too. I have one cat eye mask left, and I may just take it to the black, lacey, racey height it deserves!
I must admit I’ve always been a sucker for a great feather!
Here are Allie and I playing around. To be honest, she can’t really keep her hands off of them.
DIY Directions start here:
Materials:
Fabric Scraps
Embellishments (ribbon, jewels, glitter, feathers)
Glue
Scissors
Paintbrush
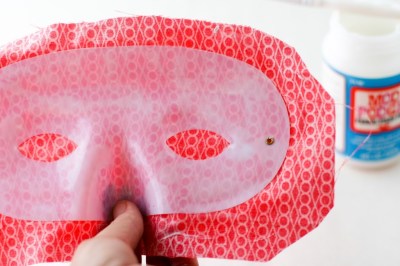
Cut fabric about an inch larger than mask all the way around. Snip the knot off one end of the elastic and pull the elastic out of the mask by the other hole. Set the elastic aside for later.
Apply a layer of Mod Podge on fabric. This worked well on the plastic mask. On the mask that was more paper in content, I used regular craft glue for this step.
Press fabric to mask, making sure to press down and smooth wrinkles where mask bends. Wrap and secure edges around the mask, trimming any excess fabric as you go.
Note: If you do the cat’s eye mask, you need to take a snip at the point between the eyes so you can fold the fabric the appropriate direction.
Next, snip a hole in the center of each eye, and cut radially to the edge of the eye opening.
Push cut fabric from eye hole through and secure to the back of the mask with more glue or Mod Podge. Poke holes through the mini-grommets for the elastic band. I used my seam-ripper for this task, because the point seemed the right size. You could use a darning needle, too.
Apply two more coats of Mod Podge, waiting for each coat to dry in between. Don’t forget to re-poke the holes for the elastic each time.
Decorate the mask to your heart’s delight. I let the kids each do one – they chose feathers, bows, and jewels. We used glue to secure the decorations.
Now re-feed the elastic band through the mask and tie a knot. I used my seam ripper to poke the elastic through.
Voila.
Love!
Which is your favorite? What would you do to your mask?








Leave a comment
This site is protected by reCAPTCHA and the Google Privacy Policy and Terms of Service apply.